|
|
[调查]你们是不是也觉得自己买会员很伤自尊?
今年转正,好激动呀!! |
|
|
[原创]升会员必经之路
来来来,大家一起水,成为会员,从此走向人生。。 |
|
|
发个邀请码!
心塞,谁用了,也不感谢一下,白试了一下 |
|
|
[原创]开源项目——x86汉语汇编
没必要吧。。英语很好啊,add敲三个键盘就行,你说汉语也是,好吧,你需要安装汉语输入法吧!那么 mul呢?五笔tux,拼音cheng,还要选字,累不? |
|
|
[讨论]争取转正!
加油,奋斗中+1 |
|
|
[调查]你们是不是也觉得自己买会员很伤自尊?
付款不支持支付宝二维码扫描,作为一个安全学习人员,从浏览器输入帐号和密码太不安全,手机APP我可以通过严格权限保证安全性,但电脑经常数据和软件更新,表示不安全,除非我能自己分析自己电脑完全不带木马或什么的 |
|
|
[分享]IDAPython和《加密与解密》
在《加密与解密 3rd》3.4 静态分析技术实例的学习中,对GetWindowText GetDlgItemText这些关键字和API并不理解,也看了MSDN的API说明 ,对于我这样没学过windows编程的人来说,以下MSDN说明又引起了新的困惑: UINT WINAPI GetDlgItemText( _In_ HWND hDlg, _In_ int nIDDlgItem, _Out_ LPTSTR lpString, _In_ int nMaxCount ); Parameters hDlg [in] Type: HWND A handle to the dialog box that contains the control. 什么是Dialog box?于是又去百度。。。首先还是看下Windows的所有窗体吧!如下图所示,自己可浏览所有窗体,附件有PPT介绍Windows窗体应用开发。不过,如果时间充足,还是建议学习下window API编程之类的。 附件有PPT:http://pan.baidu.com/s/1i36hWWX   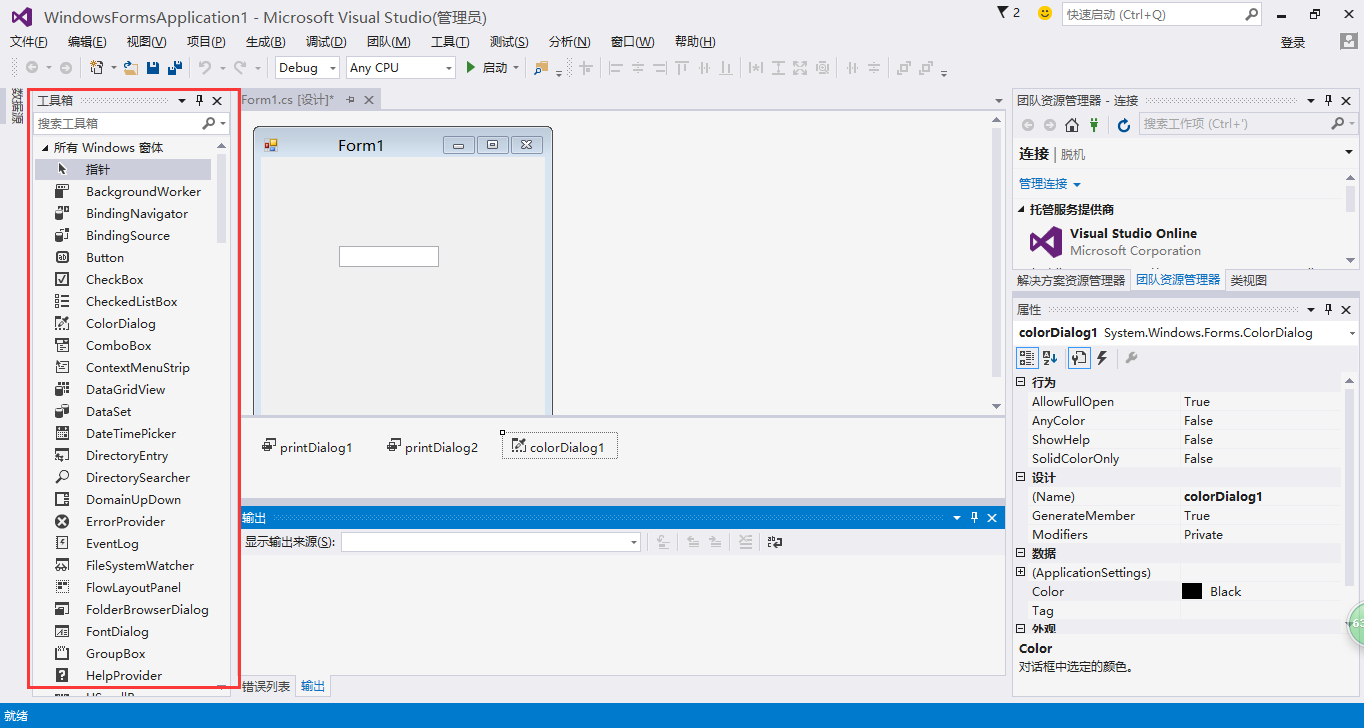 |
|
|
[原创]找个好日子,准备升级正式会员
坐等转正,朋友们加油!!! |
|
|
[求助]逆向方面入门求助
建议查看招聘广告,逆向破解、逆向病毒分析、学写漏洞利用代码,做APT攻击,做渗透测试。。。逆向和病毒当然的关系,对安全分析者而言,只能看到二进制代码,不逆向分析反汇编代码,脱壳,解密等操作,如何发现对方利用的什么0day? |
|
|
[求助]盗号网站后台破解
这个你如果有渗透基础,使用 sqlmap试试 |
|
|
[分享]IDAPython和《加密与解密》
今天看到加密与解密P65了,书中讲到修改程序的CrateWindowEx样式参数。首先CrateWindowEx是什么?其次,书上说的winuser.h头文件在哪里看? 对于我这样的新手,对于Windows API 如果查,怎么查,刚开始是不知道的,现在给初学的朋友说一下吧: Windows API查询:百度“MSDN CrateWindowEx”,建议查看英文版本,中文翻译很差 Windows 头文件查看:(建议配合书做) 环境:VC++ 2010 Express Edition(精简)或安装Windows SDK (完整) 头文件:winuser.h WindowsAPI:https://msdn.microsoft.com/en-us/library/aa930455.aspx dwStyle参数:WS_HSCROLL,WS_VSCROLL 查询头文件: WS_HSCROLL 0010 0000h WS_VSCROLL 0020 0000h 参数运算(IDAPython,python做这种计算非常方便) 多个参数使用XOR运算 当前参数:0CF0000h >>>hex(0x00100000|0x00200000|0x0CF0000) 结果:0xff0000 注意:python使用0x作为16进制前缀,并非0cff0000h这种形式,不使用hex函数,结果将显示为10进制形式  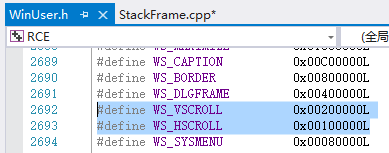 |
|
|
[分享]IDAPython和《加密与解密》
我也新手,帮不了你,抱歉 |
|
|
[分享]IDAPython和《加密与解密》
由看雪论坛转载,那篇文章可读性太差,我重新排版,并对关键字标注,附件中为*.mht网页格式,方便阅读。 使用FLIRT签名识别库(Library recognition using flirt signatures) 在“The initial autoanalysis has been finished”[1]之后,该是到了探索IDA更高级功能的时候了。这一章中我们将讨论一些识别标准代码序列的技术,如包含在静态链接二进制中的库代码,或者编译器插入的标准初始化和辅助函数。 当逆向二进制时,您要做的最后一件事就是花费时间去逆向库函数了,然而这些函数的功能却可以很轻松的通过阅读帮助文档、源代码,或是在互联网上搜索了解到。静态链接二进制所带来的难题是应用程序代码和库代码的区分很模糊。在静态链接二进制中,整个库与应用程序代码互相结合,形成一个密不可分的可执行文件。不过幸运的是,有些工具可以让IDA识别并且标记出库代码,使我们把注意力集中在应用程序自身的代码上。 库文件快速识别与鉴定技术(Fast Library Identification and Recognition Technology) 库文件快速识别与鉴定技术(Fast Library Identification and Recognition Technology),简称为FLIRT,包含了一组IDA用来标识库代码序列的方法。FLIRT的核心技术是模式匹配算法,这使得IDA能够迅速确定一个反汇编后的函数是否匹配IDA中许多已知签名的一个。 <IDA_DIR>/sig目录包含了IDA附带的签名文件,在大多数情况下,这些签名与常见的Windows编译器生成的库相关,但少数非Windows的签名也包括在内。 签名文件使用自定义格式,其中大部分签名数据被压缩和包含在一个IDA指定的头文件中。多数情况下,签名文件的名称不能清楚地表明这个签名文件是由哪个库产生的,签名文件可以包含一个库名字的注释来描述其内容,这取决于它们的创建过程。如果我们从签名文件中提取ASCII内容,查看它们的前几行,往往就能够发现这个注释。下面的Unix风格命令[3] 可以用于输出这些注释,注释一般在第二或第三行: # strings sigfile | head -n 3 IDA两种办法查看相关签名文件: 第一,通过View -> Open Subviews -> Signatures(Shift+F5),可以查看到已经应用于二进制的签名列表; 第二,通过 File -> Load File -> FLIRT Signature File,作为手动签名应用程序流程的一部分,显示出所有的签名文件列表。 应用FLIRT签名(Applying FLIRT Signatures) 当一个二进制第一次打开时,IDA尝试对入口点应用startup签名指定的相关签名文件。原来,各种不同的编译器所产生的入口点代码是相当不同的,入口点签名匹配技术可以有效的鉴定出一个给定的二进制的编译器类型。 MAIN VS. _START 我们知道,一个程序的入口点就是将被执行的第一条指令的地址。长期以来,许多C程序员错误地认为这是main函数的地址,实际上并非如此。程序的文件类型,但不是创建这个程序的语言类型,决定了以何种方式提供命令行参数给程序。为解决加载器传递命令行参数的方式和程序期望的接收方式之间的差异(例如,传递参数给main),在转移控制权给main之前必须执行一些初始化代码。正是这段初始化代码被IDA指定为程序的入口点,并且定义为标签_start。 这段始化代码还负责其它任何允许main运行前的初始化任务。在C++程序中,该代码负责在main执行前保证全局定义对象的构造函数被调用。同样,为了在程序真正结束前调用全局对象的析构函数,释放代码被插入在执行main之后。 如果IDA确定了创建一个二进制的编译器类型,将会载入和该编译器库相对应的签名文件,并且应用到二进制的剩余部分。 随IDA发布的签名文件趋向于某些私有的编译器,如Microsoft Visual C ++或Borland Delphi。幕后的原因是因为与这些编译器相关的二进制库的数量有限。而开源的编译器如GNU gcc,与它相关的二进制库数量和操作系统一样众多,比如每个版本的FreeBSD都有个唯一的C标准库版本。由于最佳模式匹配的原因,签名文件需要与每个不同版本的库相对应,考虑到要收集随每一个Linux发行版而发行的每一个libc.a[4]的版本非常困难,是不切合实际的。从某种程度上说,这些差异是由于改变了库的源代码,因而编译后代码不一样。但是使用不同的编译选项,如优化设置和不同的编译器版本来创建库,也可能会导致巨大的差异。最终的方案是,IDA附带了非常少的开源编译器库的签名文件。不过你将很快看到的好消息是,Hex-Rays生成工具允许你从静态库中创建你自己的签名文件。 ibc.a是类Unix操作系统中静态链接版本的C标准库的二进制文件。 那么,在什么情况下需要手动应用签名到您的数据库中呢?某些情况下,IDA正确识别出了生成二进制的编译器,但没有编译器库相关的签名文件可用,这时候,您既可以工作在没有签名的世界中,也可以去获取一份该二进制使用的静态库文件副本,然后生成你自己的签名。其他情况下,IDA可能只是简单地表明识别编译器失败,因此无法确定哪些签名应该应用于数据库。在分析初始化函数被完全破坏以便去除编译器标识的混淆代码时,通常会发生这种情况。那么,在你还抱有希望去匹配任何库签名之前,要做的第一件事就是去充分地反混淆该二进制。我们将在第21章讨论处理混淆代码的技术。 不管何种原因,如果您想手动应用签名到一个数据库,可以通过 File -> Load File -> FLIRT Signature File,打开的签名选择对话框如图12-1所示。 图12-1:选择FLIRT签名 File栏列出了<IDADIR>/sig目录下所有的.sig文件名。注意,不可更改.sig文件的存放位置。如果您曾经生成了您自己的签名,需要连同其它所有的.sig文件一起放到<IDA DIR>/sig目录。Library name栏显示了库名的注释,它被嵌入于每个文件中,记住这些注释只能由签名创建者(这可能是你!)来指定。 当一个库模块被选择后,相应.sig文件中包含的签名就被加载,与数据库中的每个函数作比较。一次只能应用一组签名,因此如果您想应用多个不同的签名到数据库,就得重复此过程。当一个与签名相匹配的函数被找到后,该函数就被标识为库函数,并且根据已匹配的签名进行自动重命名。 警告:只有命名为IDA伪名称的函数名才可以被自动重命名。换句话说,如果您已经重命名了一个函数,之后这个函数匹配上了一个签名,那么这个函数将不会再被重命名。因此,在您的分析过程中尽可能早点应用签名是有好处的。 回想一下,静态链接二进制模糊了应用程序代码和库代码的分别。如果你足够幸运,有一个没有剥离符号信息的静态链接二进制,你将至少拥有有用的函数名称(与创建它的可靠程序员一样有用)来帮助您通过代码理清思路。但是,如果该二进制已被剥离符号,你将可能拥有数以百计个函数,所有这些由IDA生成的函数名称无法表明该函数是什么功能。在这两种情况下,都只有在签名有效时IDA才能够确定库函数 (未被剥离符号二进制中的函数名称并不能给IDA提供足够的信息来最终确定一个函数是库函数)。 图12-2显示了一个静态链接二进制的导航面板。 图12-2:未被签名的静态链接二进制 这个图中,没有函数被识别为库函数,因此您可能会发现需要自己分析的代码比你真正需要的多得多。在应用一组正确的签名之后,导航面板转化为图12-3。 图12-3:应用签名后的静态链接二进制 如你所看到的,导航面板提供了对于一组特定签名有效性的最好说明,有了这很大比例的相匹配签名,大量的部分代码将被标记为库代码并相应重命名。例如在图12-3中,集中在导航图的极左部分代码很可能就是实际应用程序的具体代码。 在应用签名时有两点值得记住: 第一,即使一个二进制文件没有被剥离符号,签名也是有用的,这种情况下您应用签名更多的是帮助IDA识别库函数,而不是重命名这些函数; 第二,静态链接的二进制可能由多个独立的库组成,需要应用多组签名以便完全识别所有的库函数。每增加一组签名应用,导航面板的将有部分变化以反映发现的库代码。 图12-4显示了这样一个例子,在这个图中,你会看到一个静态链接二进制使用了C标准库和OpenSSL[5] 加密库。 图12-4:多组签名中应用第一组后的静态二进制 具体来说,您会看到随着应用程序使用正确的OpenSSL版本签名,IDA标记了一小段(地址范围左边的高亮段)作为库代码。静态链接的二进制往往是先创建应用程序本身的代码,然后添加所需的库,最后形成可执行文件。鉴于这种情况,我们可以得出这样的结论,OpenSSL库代码添加在内存空间的右边,而应用程序代码则最有可能在OpenSSL库的左边。 如果我们在图12-4的基础上继续应用签名,最终得到如图12-5显示。 图12-5:多组签名中接着应用的静态二进制 在这个例子中,我们为libc,libcrypto,libkrb5,libresolv等等应用了签名。某些情况中,我们基于库中字符串位置来选择签名;其他情况下,我们基于二进制中已被定位的有着密切联系的其它库来选择签名。从显示结果中继续看到,导航区右半段是个黑色带,极左边的边界处是一段更小的黑色带。二进制的剩余未知部分需要进一步的分析。这时候,我们应该知道,黑色带的右侧更广阔区域是一个未知的库,而黑色带的左边是应用程序代码。 创建FLIRT签名文件(Creating FLIRT Signature Files) 正如我们之前讨论的,IDA为每一个存在的静态库发布签名文件是不现实的。为了给IDA用户提供工具和必要的信息,以便他们创建自己的签名,Hex-Rays发布了Fast LibraryAcquisition for Identification and Recognition(FLAIR)工具集。授权用户可以通过IDA发行CD获取或者去Hex-Rays网站下载。象IDA的其他插件一样,该工具集以Zip文件发布。IDA 5.2版本的FLAIR52.zip包含了相关的FLAIR工具。Hex-Rays不一定会为每个版本的IDA发布一个新版,所以你应该使用不高于你的IDA版本的最新版FLAIR。 安装FLAIR工具集是个简单事情,只需解压缩相关的Zip文件即可,但我们强烈建议您建立专门的FLAIR目录来存放,因为这个Zip文件是没有组织的顶级目录。FLAIR工具中你会看到几个由文本文件构成的文档,值得关注的文件包括这些: readme.txt 这是一个签名创建过程的顶级概述。 plb.txt 这个文件描述了静态库解析器plb.exe的使用,在第219页“创建模式文件”中对库解析器有更详细的讨论。 pat.txt 这个文件详细描述了模式文件的格式,这是签名创建过程的第一步。模式文件的描述也在第219页“创建模式文件”中。 sigmake.txt 这个文件描述了sigmake.exe的使用,它用来从模式文件中生成签名文件。更多细节请参阅第221页“创建签名文件”。 另外我们感兴趣的顶级内容还包括bin目录,它包含了FLAIR工具集的所有可执行文件;还有startup目录,包含了与各种编译器的通常初始化顺序和输出文件类型(PE,ELF,等等)相关的模式文件。 FLAIR工具集还有个很重要的一点是,尽管所有的工具都只能运行在Windows命令行下,但生成的签名文件可用于所有的IDA版本(Windows,Linux和OS X)。 创建签名概述 创建签名文件的基本流程不是很复杂,可归结为四个简单的步骤。 1. 获取一份您所要创建的签名文件的静态库文件。 2. 利用一个FLAIR解析器为该库创建一个模式文件。 3. 运行sigmake.exe处理由此产生的模式文件,生成一个签名文件。 4. 复制它到<IDADIR>/sig目录,为IDA中安装新的签名文件。 不幸的是,现实中只有最后一个步骤和说的一样容易。在以下各节,我们来更详细地讨论前三个步骤。 识别和获取静态库 签名创建过程的第一步是为你想要创建的签名找到一份静态库,这可能有点挑战性,原因有很多。第一个问题就是确定哪些库是你真正需要的,如果你正在分析的二进制文件并没有被剥离符号,那么在您反汇编后可能会幸运地看到很多实际函数的名字,这种情况下,Google将会提供一些可能有用的备选信息。 被剥离了符号的二进制由于缺乏函数名,不太容易找到其起源,为了确认库有个很好的办法,就是通过strings来搜索足够独特的字符串,如以下: OpenSSL 0.9.8a 11 Oct 2005 版权告示和错误字符串往往是足够独特的,可以再次使用Google来缩小搜索范围。如果您是从命令行运行strings,请记住使用-a选项来强制strings扫描整个二进制;否则,你可能会错过一些有用的字符串数据。 在开放源代码库,你会发现源代码是现成的。不幸的是,虽然源代码可以帮助你理解二进制的行为,但您却不能用它来生成您的签名。您可以使用源代码来建立自己的静态库版本,然后用该版本来创建签名。然而,在所有可能的情况下,不同的创建过程会使生成的库与你正分析的库相差很大,导致您产生的签名文件是相当不准确的。 解决这个问题的最好办法是确定这个二进制的起源,在这里我们指的是准确的操作系统,操作系统版本,和发行版本(如果有的话)。因此,创建签名时使用的库最好是从相同配置的系统中得到的。 当然,这会引出下一个问题:对于一个任意的二进制,它是在什么系统上创建的?对于这个问题,一个好的开始是使用file程序来获得这个二进制的一些初步了解。在第2章我们看到过file程序的一些样例输出,某些情况下,这一输出足够提供可能的备选信息。以下是一个非常典型的file输出例子: $ file sample_file_1 sample_file_1: ELF 32-bit LSB executable, Intel 80386, version 1 (FreeBSD), for FreeBSD 5.4, statically linked, FreeBSD-style, stripped 这种情况下,我们可以一开始就直接从FreeBSD 5.4系统得到libc.a。然而,下面的例子是比较含糊的: $ file sample_file_2 sample_file_2: ELF 32-bit LSB executable, Intel 80386, version 1 (SYSV), for GNU/Linux 2.6.9, statically linked, stripped 由于可用的Linux发行版本也不是许多,我们可以缩小Linux系统的范围。借助于strings我们找到如下字符串: GCC: (GNU) 4.1.1 20060525 (Red Hat 4.1.1-1) 在这里,范围已缩小到Red Hat(或其衍生版本)附带的gcc 4.1.1版本。GCC标记表明该二进制使用了常见的gcc编译器编译,我们很幸运地看到,这些字符串在剥离过程中幸免于难,并且对strings仍然可见。 请记住,file程序并不能解决所有的文件识别问题。下面的一个简单示例输出表明,file似乎知道正在检查的文件类型,但输出是很不明确的。 $ file sample_file_3 sample_file_3: ELF 32-bit LSB executable, Intel 80386, version 1 (SYSV), dynamically linked (uses shared libs), stripped 这个例子是在Solaris 10 X86系统中输出的。这时,使用strings程序可能会对查明这一事实有所帮助。 创建模式文件 在这时你应该有了所要创建签名的一个或多个库文件,下一步就是为每个库创创建一个模式文件。模式文件要使用正确的FLAIR解析器程序来创建。像可执行文件,库文件被创建为各种规范的文件格式一样,FLAIR为多种流行的库文件格式提供了不同的解析器,详细说明见FLAIR的readme.txt文件,在FLAIR的bin目录中可以找到以下解析器: plb.exe 解析OMF库(通常是Borland编译器使用) pcf.exe 解析COFF库(通常是Microsoft编译器使用) pelf.exe 解析ELF库(许多Unix系统使用) ppsx.exe 解析Sony PlayStation PSX库 ptmobj.exe 解析TriMedia库 pomf166.exe 解析Kiel OMF 166对象文件 要为指定的库创建一个模式文件,需要指定库格式对应的解析器,要解析的库名称,以及所产生的模式文件名称。例如,对于一份FreeBSD 6.1系统的libc.a,您可以使用如下命令: $ ./pelf libc.a libc_FreeBSD61.pat libc.a: skipped 0, total 986 在这里,解析器输出了被解析的文件(libc.a),跳过的函数个数(0),及产生的签名模式数量(986)。每个解析器接受的命令选项略有不同,只根据解析器的使用情况作相应输出。如果不带任何参数的执行一个解析器,将会显示该解析器所能接受的所有命令行选项。plb.txt文件包含了plb.exe解析器支持选项的更详细信息,这文件是个不错的基本来源信息,因为其他解析器能接受的大多数选项以它为准。许多情况下,简单地指定要被解析的库名称和要产生的模式文件就足够了。 模式文件是个文本文件,其中每一行代表一个被解析库的函数。前面创建的模式文件中有几行显示如下: 5589E58B55108B450C8B4D0885D2EB06890183C1044A75F88B4508C9C3…... 00 0000 001D :0000 _wmemset 5589E58B4D1057C1E102568B7D088B750CFCC1E902F3A55E8B45085FC9C3.... 00 0000 001E :0000 _wmemcpy 5589E556538B751031DB39F38B4D088B550C73118B023901751183C10483C204 19 A9BE 0039 :0000 _wmemcmp FLAIR的pat.txt文件描述了一个单独模式的格式。概括地说,模式的第一部分列出了函数的初始字节序列,最多为32个字节,具体容量可能会由于入口位置而有所不同。每个字节使用两个点显示,当一个函数少于32字节时用点来填充以补满64[8]个字符(如前面代码中的_wmemset)。除了最初的32个字节,还有一些附加信息被记录,以便在签名匹配过程中提供更精确的信息。附加信息被编码到每个模式行,其中包括计算部分内容的CRC16[9] 值,以字节为单位的函数长度以及函数所引用的符号名列表。一般来说,引用了许多其它符号的长函数会形成更复杂的模式行。在前面生成的libc_FreeBSD61.pat文件中,一些模式行的长度超过20000个字符。 有些第三方程序员开发了一些实用工具,用来从现有的IDA数据库中生成模式文件。例如J.C.Roberts编写的一个IDA插件:IDB_2_PAT[10],它能够从现有的数据库中为一个或多个函数生成模式;如果你在其它的数据库中遇到相似的代码,或者正分析一个二进制,但是没有获得原来创建它的库文件,这些工具是很有用的。 7plb和pcf解析器可能会跳过某些函数,这取决于提供给解析器的命令行选项和被解析的库结构。 8每个字节有两个字符,显示32个字节的内容需要64个字符。 9这是一个16位循环冗余校验值,该CRC16用于模式生成的执行细节见FLAIR工具的crc16.cpp文件。 10 更多信息请访问:http://www.openrce.org/downloads/details/26/IDB_2_PAT. 创建签名文件 一旦你为某个库创建了一个模式文件,签名创建过程的下一步就是生成一个适用于IDA的.sig文件。IDA签名文件的格式与模式文件完全不同,签名文件使用了一种专有的二进制格式,被设计为尽量减少占用的空间,力求能够表达模式文件中的所有信息,以便签名文件和实际的数据库内容有效地匹配。对签名文件结构的一个高级别描述,可在Hex-Rays[11] 网站上找到。 FLAIR的sigmake.exe程序用于从模式文件中创建签名。模式创建和签名创建分为两个不同的阶段,签名创建过程完全独立于模式创建过程,这就允许使用第三方的模式创建工具。 创建签名的最简单方法是,使用sigmake.exe解析一个.pat文件并创建一个.sig文件,如下所示: $ ./sigmake libssl.pat libssl.sig 如果一切顺利,会生成一个.sig文件,并准备安装到<IDADIR>/sig。然而,这个过程很少能够顺利地进行。 注意:sigmake的说明文档sigmake.txt中建议,签名文件的名字最好遵守MS-DOS 8.3名称长度规范。这不是一个硬性的要求,但是,如果使用了长文件名,将会只有文件名称的前8个字符能够显示在签名选择对话框中。 创建签名往往是个反复的过程,因为在这一阶段有冲突发生时必须处理。任何时候如果两个函数有相同的模式就会发生冲突。如果冲突不以某种方式解决,在应用签名的过程中就无法确定事实上匹配了哪个函数。因此,sigmake必须使产生的每一个签名正好对应一个函数名。如果这个基本条件没有满足,导致一个或多个函数有着相同的签名,sigmake就会拒绝生成签名文件,取而代之生成一个排斥文件(.exc)。第一次使用sigmake传递一个新的.pat文件(或一组.pat文件)时,更典型的输出可能如下。 $ ./sigmake libc_FreeBSD61.pat libc_FreeBSD61.sig See the documentation to learn how to resolve collisions. : modules/leaves: 13443631/970, COLLISIONS: 911 文档文件sigmake.txt叙述了sigmake的使用及解决冲突的过程。事实上,每次sigmake执行时,先搜索相应的排斥文件,因为该文件中包含了sigmake在处理已命名模式文件中可能会遇到的冲突,及怎样解决冲突的有用信息。如果没有这个排斥文件,当冲突发生时,sigmake就会生成一个排斥文件,而不是生成一个签名文件。在前面的例子中,我们会找到一个新产生的名为libc_FreeBSD61.exc的文件。当第一次被创建时,排斥文件是个文本文件,包含了sigmake在处理模式文件中遇到的冲突细节,排斥文件必须被修改以提供sigmake关于如何解决模式冲突的指示。编辑一个排斥文件的一般过程如下。 11更多信息请访问:https://www.hex-rays.com/products/ida/tech/flirt/index.shtml sigmake生成的所有排斥文件开头几行都如下所示: ;--------- (delete these lines to allow sigmake to read this file) ; add '+' at the start of a line to select a module ; add '-' if you are not sure about the selection ; do nothing if you want to exclude all modules 这几行的目的是提醒你应该怎样做,才能解决冲突以成功地生成签名。首要事情就是删除以分号开头的这四行,否则sigmake在随后的执行中将无法解析排斥文件。接下来的步骤是告诉sigmake您想要解决的冲突。从libc_FreeBSD61.exc提取出来的几行示例如下: ___ntohs 00 0000 0FB744240486C4C3................................................ ___htons 00 0000 0FB744240486C4C3................................................ _index 00 0000 538B4424088A4C240C908A1838D974074084DB75F531C05BC3.............. _strchr 00 0000 538B4424088A4C240C908A1838D974074084DB75F531C05BC3.............. _rindex 00 0000 538B5424088A4C240C31C0908A1A38D9750289D04284DB75F35BC3.......... _strrchr 00 0000 538B5424088A4C240C31C0908A1A38D9750289D04284DB75F35BC3.......... 这几行详细区分了三个冲突。这种情况下,我们被告知函数ntohs和htons无法区分,index和strchr具有相同的签名,rindex和strrchr有冲突。如果您熟悉以上几个函数的话,对这种结果可能并不感到奇怪,因为这些冲突函数的功能基本上是相同的(例如,index和strchr执行同样的操作)。 为了让你自己控制签名,sigmake期望你对每组适当函数相关的签字指定不超过一个函数。如果您想在数据库匹配上相应签名的任何时候都应用该名字,就在其前面添加一个字符(+);如果你想在数据库匹配上相应签名时简单地添加一条注释,就在其前面添加一个减号字符(-);如果你想在数据库匹配上相应签名时不应用任何名字,就不要添加任何字符。对前面所述的三个冲突,下面列出了一个可能有效的解决方式: +___ntohs 00 0000 0FB744240486C4C3................................................ ___htons 00 0000 0FB744240486C4C3................................................ _index 00 0000 538B4424088A4C240C908A1838D974074084DB75F531C05BC3.............. _strchr 00 0000 538B4424088A4C240C908A1838D974074084DB75F531C05BC3.............. _rindex 00 0000 538B5424088A4C240C31C0908A1A38D9750289D04284DB75F35BC3....... -_strrchr 00 0000 538B5424088A4C240C31C0908A1A38D9750289D04284DB75F35BC3.......... 这表示,第一个签名匹配时我们选择使用ntohs名字,第二个签名匹配时什么也不做,第三个签名匹配时添加strrchr为注释。在解决冲突时有必要记住以下几点: 1. 要最简单地解决冲突,只需删除排斥文件的开头四行。 2. 在每个冲突组中不要为一个以上的函数添加+/-。 3. 如果发生冲突的组中只包含一个函数,不要添加+/-在其前面,只是保持原样。 4. sigmake再次失败后会导致注释行等数据被附加到现有的排斥文件后面。在运行sigmake前应该删除这些额外的,并纠正原始数据(因为如果数据是正确的,sigmake在第二次也不会失败)。 一旦对排斥文件作出了正确的更改,必须保存该文件,并使用和最初使用时相同的命令行参数重新运行sigmake。通过第二次运行,sigmake应该能找到并依照你的排斥文件,从而成功地生成一个.sig文件。注意,sigmake操作成功是指没有输出错误消息并生成了一个.sig文件,如下所示: $ ./sigmake libc_FreeBSD61.pat libc_FreeBSD61.sig 在签名文件成功生成后,就可以复制它到您的<IDADIR>/sig目录下使它生效。然后,您就可以在File -> Load File -> FLIRT Signature File中使用它了。 请注意,我们并没有介绍模式创建和sigmake的所有选项,plb.txt和sigmake.txt提供了所有有效选项的列表。使用sigmake时我们唯一要注意的是-n选项,这个选项让您可以插入一个描述性名称到签名文件中,这个名称被显示在签名选择过程中(见图12-1),它有助于您对有效签名进行排序。 以下命令行插入一个“FreeBSD 6.1 C standard library”名称到所产生的签名文件中: $ ./sigmake -n"FreeBSD 6.1 C standard library" libc_FreeBSD61.pat libc_FreeBSD61.sig 另外,库名称还可以在排斥文件中被指定。然而,由于排斥文件并不是在所有创建签名的情况中都需要,所以命令行选项通常是更有用的。如需进一步详情,请参阅sigmake.txt。 Startup签名 IDA还有一种专用签名,称为startup签名。startup签名使用在当二进制被第一次加载到数据库时,并试图识别创建该二进制的编译器。如果IDA可以识别出用来创建二进制的编译器,那么在开始分析二进制期间,与识别出的编译器相对应的签名文件就被自动加载。 由于当一个文件被第一次载入时,编译器类型最初是未知的,根据载入的二进制文件类型,startup签名被分组选择载入。例如,当一个Windows PE二进制被载入时,PE二进制相关的startup签名被载入,试图识别出用于创建PE二进制的编译器类型。 为了生成startup签字, sigmake对描述了各种编译器生成的startup函数[12] 的模式做出处理,然后把产生的的签名组合到一个指定类型的签名文件中。FLAIR的startup目录包含了IDA所使用的startup模式,startup.bat 脚本用来从这些模式文件中创建相应的startup签名。使用sigmake为指定文件格式创建startup签名的示例可参考startup.bat。 对于PE文件,你会在startup目录下看到有若干个pe_*.pat文件,它们描述了一些流行的Windows编译器所使用的startup模式,包括Visual Studio的pe_vc.pat和Cygwin/gcc的 pe_gcc.pat。 12 startup函数通常是指程序的入口点。在一个C/C++程序中,startup函数的作用是在传递控制权给main函数前对程序的环境变量进行初始化。 如果您想为PE文件添加更多的startup模式,需要将它们添加到一个现有的PE模式文件,或者以pe_前缀开头创建一个新的模式文件,以便startup签名创建脚本能够正确地找到您的模式,并将其合并到一个新的PE签名。 关于startup模式最后一个要注意的是它的格式,不幸的是它和库函数生成的模式略有不同。事实上那个不同之处在于,即startup模式行拥有更多的模式签名集,如果与这个模式匹配它也被应用。除了在startup目录下包含startup模式示例外,FLAIR没有其它任何关于startup模式格式的文档。 总结(Summary) 库代码的自动识别是一项重要功能,大大减少了分析静态链接二进制文件所需的时间。通过FLIRT和FLAIR,IDA使代码的自动识别不仅是可能的,而且可扩展为允许用户从现有的静态库中创建他们自己的库签名。熟悉签名生成过程对于需要分析静态链接二进制文件的人来说是一项重要技能。 |
|
|
[分享]IDAPython和《加密与解密》
没明白你意思,麻烦详细点么? |
|
|
[分享]IDAPython和《加密与解密》
#!/usr/bin/env python #coding:utf-8 #20151019 14:48 《加密与解密 3rd》P61 实例2 用IDC分析加密代码 IDAPython实现 #patch_byte(ea, x) -->bool 将解密数据放回原处 from idc import * def decrypt (start,size,key): s=start for i in range(size): x=Byte(start)^key patch_byte(start,x) start+=1 print('Decrypted addr %s-%s successful!' %(hex(s),hex(start))) if __name__=='__main__': decrypt(0x00401060,0x15,0x1) 命令行输出: Decrypted addr 0x401060-0x401075 successful! 解密前: .text:00401060 loc_401060: ; CODE XREF: sub_401020+Bp .text:00401060 ; DATA XREF: sub_401080o .text:00401060 imul esi, [ecx], 69h .text:00401063 sbb eax, 69014131h .text:00401068 add [ecx], esi .text:0040106A inc ecx .text:0040106B add [ebx+1], ebp .text:0040106B ; --------------------------------------------------------------------------- .text:0040106E dd 210D14FEh .text:00401072 db 41h .text:00401073 ; --------------------------------------------------------------------------- .text:00401073 add edx, eax ; DATA XREF: sub_401080+Do 解密后 .text:00401060 ; --------------------------------------------------------------------------- .text:00401060 .text:00401060 loc_401060: ; CODE XREF: sub_401020+Bp .text:00401060 ; DATA XREF: sub_401080o .text:00401060 push 30h .text:00401062 push offset unk_40301C .text:00401067 push offset aWelcomToWww_pe ; "Welcom to www.pediy.com!" .text:0040106C push 0 .text:0040106C ; --------------------------------------------------------------------------- .text:0040106E dd 200C15FFh .text:00401072 db 40h .text:00401073 ; --------------------------------------------------------------------------- .text:00401073 add bl, al ; DATA XREF: sub_401080+Do |
|
|
[求助]请教关于一个学习的计划
我也是新手,建议学《汇编语言 王爽》,然后是C++语言基础,再然后,就可以开始《加密与解密》《逆向工程核心原理》,再然后你的选择就很多了 |
|
|
[求助]逆向的问题
我是看逆向工程核心原理,再看加密与解密的,刚开始确实有这样的疑惑,但我建议,你还是好好学汇编,汇编基础不好,动态调试很费力,当然了,楼上正解,要配合IDA使用,不过基础阶段,看简单程序,能动态调试并理解,这样更好 |

操作理由
RANk
{{ user_info.golds == '' ? 0 : user_info.golds }}
雪币
{{ experience }}
课程经验
{{ score }}
学习收益
{{study_duration_fmt}}
学习时长
基本信息
荣誉称号:
{{ honorary_title }}
勋章
兑换勋章

证书
证书查询 >
能力值

