菜鸡尝试编译aosp源码,手中有一台n5x,专门用来折腾。之前刷了fart镜像,好奇制作过程,所以自己来捣鼓一下。原先想用r0env编译,有个依赖过不去(太菜了)还是自己搞个虚拟机吧*。*,把坑又踩了一遍。
虚拟机
虚拟机这里选择vmware16 pro,破解版请自行查找

iso
iso这里选择ubuntu20,因为ubuntu的镜像小。试过centos7结果操作过程崩了T。T
镜像下载:ubuntu阿里开源镜像站
# 镜像md5
ca0c7f1cf362eef25f54f6cd61c5fdba *ubuntu-20.04.4-desktop-amd64.iso
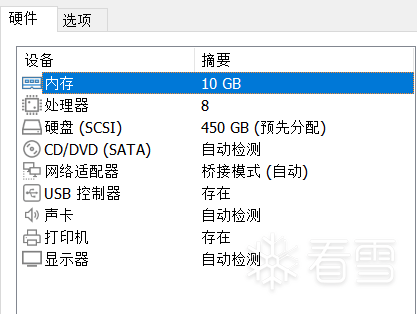
Ubuntu配置如下,内存可开到12G,10G可以编译但还会有卡顿,并且安装过程中请立即分配磁盘,避免后面磁盘大小问题:

安装依赖, 提示没有python,就apt install python
下载 repo 工具
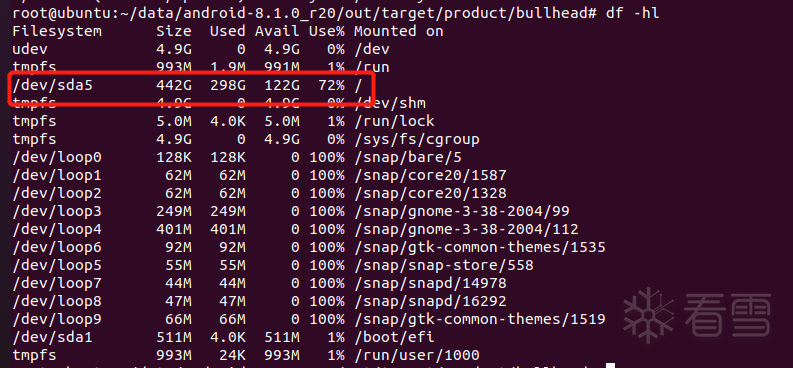
选择磁盘空间大的建立源码下载文件夹,如果磁盘不够请自行扩展磁盘和挂载文件夹


初始化git,repo;初始化repo中应查询清楚编译出来的镜像是否适配手中的手机
细分版本号查询

下载源码, 过程很长,请耐性等待
下载驱动
下载源码对应版本驱动并解压放入源码根目录:驱动下载


依次执行刚解压的shell文件(别enter的太急),每个文件执行都需要在最后输入 “I AGREE”,所以谨慎enter(坑人)。
make clobber:删除所有以前编译操作的已有输出,如果编译过单项重新编译就执行这条命令
编译
选择设备编译系统:查询设备编译系统

编译完成
配置镜像环境变量
进入fastboot模式

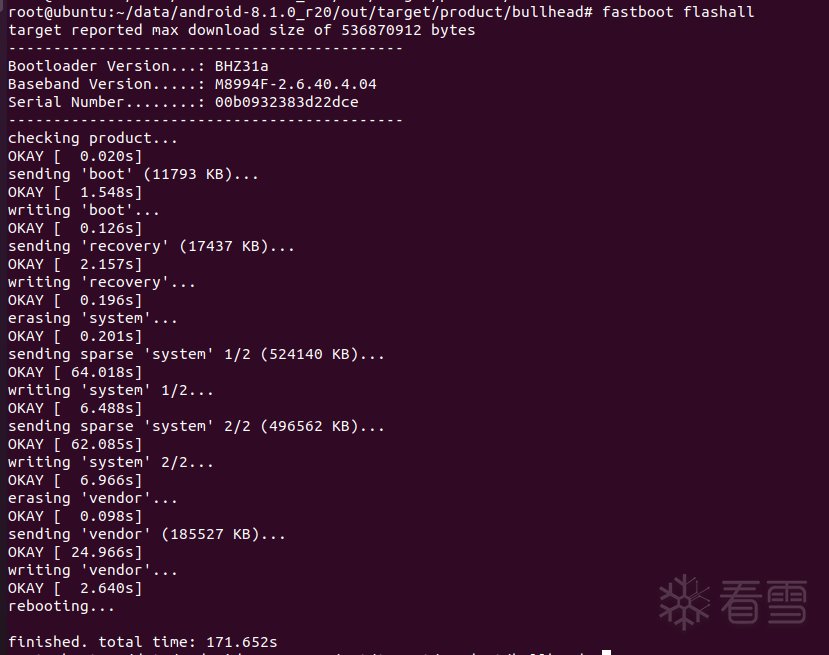
开始刷机
如果遇到这个错误“error: Cannot generate image for userdata”,请删除 -w执行
刷机结束,等待手机重启


这次编译本想周末搞完,没想到搞了一个礼拜(踩坑*N),中间还差点手机变砖T。T到总算编译刷机成功。对于fart镜像将相应的代码替换源码编译应该就可以了(还没试)。关于过root检测等系统级别的操作在 编译步骤-8 之前做出修改再编译也应是同理。在网上也有其他编译的文章,但多多少少都有点出入,写完这篇文章,根据步骤自己是可以编译和刷机成功的,但如果还有出入,需自行甄别实现。(手机变砖概不负责)
加油,少年。。。
aosp 编译过程中Jack server SSL error 错误解决方法
实战Ubuntu20编译Android8.0系统源码
动手编译一个你自己的Android系统!
记一次安卓系统源码编译刷机过程
Android 8 细分版本 分支 以及支持的设备
google android8源
android版本及对应驱动号
驱动下载
选择设备编译系统
apt-get install openjdk-8-jdk
vim ~/.bashrc
export JAVA_HOME=/usr/lib/jvm/java-8-openjdk-amd64
export PATH=$JAVA_HOME/bin:$PATH
source ~/.bashrc
apt-get install openjdk-8-jdk
vim ~/.bashrc
export JAVA_HOME=/usr/lib/jvm/java-8-openjdk-amd64
export PATH=$JAVA_HOME/bin:$PATH
source ~/.bashrc
apt-get install git-core gnupg flex bison gperf build-essential zip curl zlib1g-dev gcc-multilib g++-multilib libc6-dev-i386 lib32ncurses5-dev x11proto-core-dev libx11-dev lib32z-dev libgl1-mesa-dev libxml2-utils xsltproc unzip
apt-get install git-core gnupg flex bison gperf build-essential zip curl zlib1g-dev gcc-multilib g++-multilib libc6-dev-i386 lib32ncurses5-dev x11proto-core-dev libx11-dev lib32z-dev libgl1-mesa-dev libxml2-utils xsltproc unzip
mkdir ~/bin
PATH=~/bin:$PATH
curl https://aosp.tuna.tsinghua.edu.cn/git-repo-downloads/repo > ~/bin/repo
chmod a+x ~/bin/repo
vim ~/.bashrc
在文件末尾加入
export PATH=~/bin:$PATH
source ~/.bashrc
mkdir ~/bin
PATH=~/bin:$PATH
curl https://aosp.tuna.tsinghua.edu.cn/git-repo-downloads/repo > ~/bin/repo
chmod a+x ~/bin/repo
vim ~/.bashrc
在文件末尾加入
export PATH=~/bin:$PATH
source ~/.bashrc
mkdir -p data/aosp/android-8.1.0_r20
cd data/asop/android-8.1.0_r20
mkdir -p data/aosp/android-8.1.0_r20
cd data/asop/android-8.1.0_r20
git config --global user.name "***"
git config --global user.email "you@example.com"
export REPO_URL='https://mirrors.tuna.tsinghua.edu.cn/git/git-repo/'
repo init -u git://mirrors.ustc.edu.cn/aosp/platform/manifest -b android-8.1.0_r20
git config --global user.name "***"
git config --global user.email "you@example.com"
export REPO_URL='https://mirrors.tuna.tsinghua.edu.cn/git/git-repo/'
repo init -u git://mirrors.ustc.edu.cn/aosp/platform/manifest -b android-8.1.0_r20
repo sync -j1
repo sync --current-branch
repo sync -j1
repo sync --current-branch
fn_repo_sync()
{
repo sync -j8 2>&1 | tee sync_log.txt
}
fn_get_source_code()
{
echo "fn_get_source_code:$(pwd)"
fn_repo_sync
FETCH_ERROR=`grep -i "error: Exited sync" -A 1 sync_log.txt`
echo "${FETCH_ERROR}"
while [ -n "${FETCH_ERROR}" ]
do
echo "Need to pull the code again"
fn_repo_sync
FETCH_ERROR=`grep -i "error: Exited sync" -A 1 sync_log.txt`
done
echo "leave begin download source"
}
fn_get_source_code
fn_repo_sync()
{
repo sync -j8 2>&1 | tee sync_log.txt
}
fn_get_source_code()
{
echo "fn_get_source_code:$(pwd)"
fn_repo_sync
FETCH_ERROR=`grep -i "error: Exited sync" -A 1 sync_log.txt`
echo "${FETCH_ERROR}"
[培训]内核驱动高级班,冲击BAT一流互联网大厂工作,每周日13:00-18:00直播授课
最后于 2022-8-9 22:53
被andyhah编辑
,原因: 文中一处版本号对应问题